First insert the Ubuntu 'LiveUSB' into the device and after powering on immediately start the boot menu. This is normally achieved by 'mashing' the F7, F10 or F11 or another function key depending on you device.
Select the option to boot as the USB's first partition:
On booting from the ISO you will see a screen similar to this:
The top two options can be both be used for installing Ubuntu however the top option also allows running Ubuntu in 'live' mode which is similar to running it in a sandbox except that you can still access internal storage and any attached devices.
Having selected the first option above you will get the Ubuntu desktop displayed:
As mentioned it is possible to run commands in this 'live' mode for example to look at the current disk usage.
Using either the 'df' command:
or 'gparted' command:
it can be seen that Windows currently occupies the entire disk.
To perform the installation you can either click on the installation icon on the top left or double click the 'Install Ubuntu 18.04 LTS' icon:
Installation is menu driven with the small dots across the bottom indicating where you are in the menu cycle. First you must select the keyboard layout although the defaults are normally sufficient in most cases:
and then chose the what applications you would like to install. This release offers a new smaller and consequently quicker installation using the 'Minimal' option which is show below. Again if in doubt just go with the defaults:
You will then get a warning which you should click 'Yes' to as this is simply unmounting the Windows partition in order to be able to use it later.
You should then obviously choose the 'Install Ubuntu alongside Windows Boot Manager' to dual boot:
as this will shrink the existing Windows partition to the amount of disk space to allocated for Ubuntu. You can fine tune this or simply accept the defaults:
Alternatively if you had selected 'Somthing else' in the 'Installation type' menu you can specify in more detail the how the installation should be performed with more granualr control over disk space and partitions to use for the file system. Beginners should initially ignore this option unless comfortable with the following screen:
Once you've clicked 'Install Now' you will again get some warning messages that you can typically safely ignore. The first is really an 'Are you sure' prompt:
Followed by an 'Are you really sure' prompt:
which of course you are so click 'Continue' to move to the next menu. If you are connected to the internet the installer will try and determine you current location otherwise you can change this by clicking anywhere on the map with the effect being to set your timezone to what ever is appropriate to that location:
Next enter details about who you:
The first word of your name will automatically be suggested as your username and the computer name will become the 'host' name. Edit or accept them as appropriate:
Then enter your password. It will tell you how secure it thinks your password is:
Then enter your password again to reconfirm it. Note that if you chose a password longer than nine characters when entering it again you'll temporarily get a misleading 'Passwords do not match' message:
Just ignore this and carry on typing you password out for the full length:
After clicking 'Continue' the installation starts:
During which you will see some slides explaining key features of Ubuntu:
Don't worry about messages saying 'Removing packages' as this is normal:
Eventually it completes and waits for you next action which is convenient as you can leave the installation unattended:
At this point the newly installed Ubuntu file system is still mounted so you can take a quick look to confirm that Ubuntu really has installed along side Windows by running either the 'df' command:
or the 'gparted' command:
As the displayed message suggests you can either carry on using the sandboxed 'live' Ubuntu by clicking 'Continue Testing' or reboot to try your newly installed Ubuntu.
If you chose the 'Normal' installation it should look like the following:
There is also a brief introductory slide show highlighting the basics of the new GNOME desktop, whether to set up Livepatch (to automatically keep updated without rebooting), whether to send crash reports to Canonical and a brief introduction to popular applications that are available for installation:
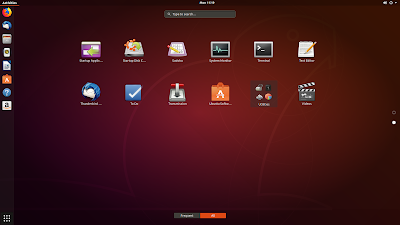
Clicking on the icon on the bottom left shows the applications currently installed:
or for the 'Minimal' installation like this (including the brief introductory slide show):
with a smaller subset of applications installed:
A nice cosmetic touch is to try out the 'community theme' I wrote about here which changes the icons in the 'Normal' installation to look like:
:
or like this for the 'Minimal' installation:
One thing you may encounter early on is a message about updates. For example using a minimal installation as an example you might get the following message:
which if you click on 'Install Now' will prompt you for your password and then starts installing the updates:
and may require a reboot if the kernel has been updated:
Packages (as applications are known) can be installed through clicking on the 'Ubuntu Software' icon on the left or can be manually installed though the command line. For example installing 'gparted':
also automatically creates and icon. So before the installation it looked like:
and afterwards like:
There are plenty of guides on how to use Ubuntu and if you get stuck you should look at:
Please donate if you find this guide useful using the following link http://goo.gl/nXWSGf.


1 comment:
Use 'pastebinit' and post a link to a 'dmesg'immediately after booting so I can your device's details.
Post a Comment
All comments now moderated so that spam can be deleted.